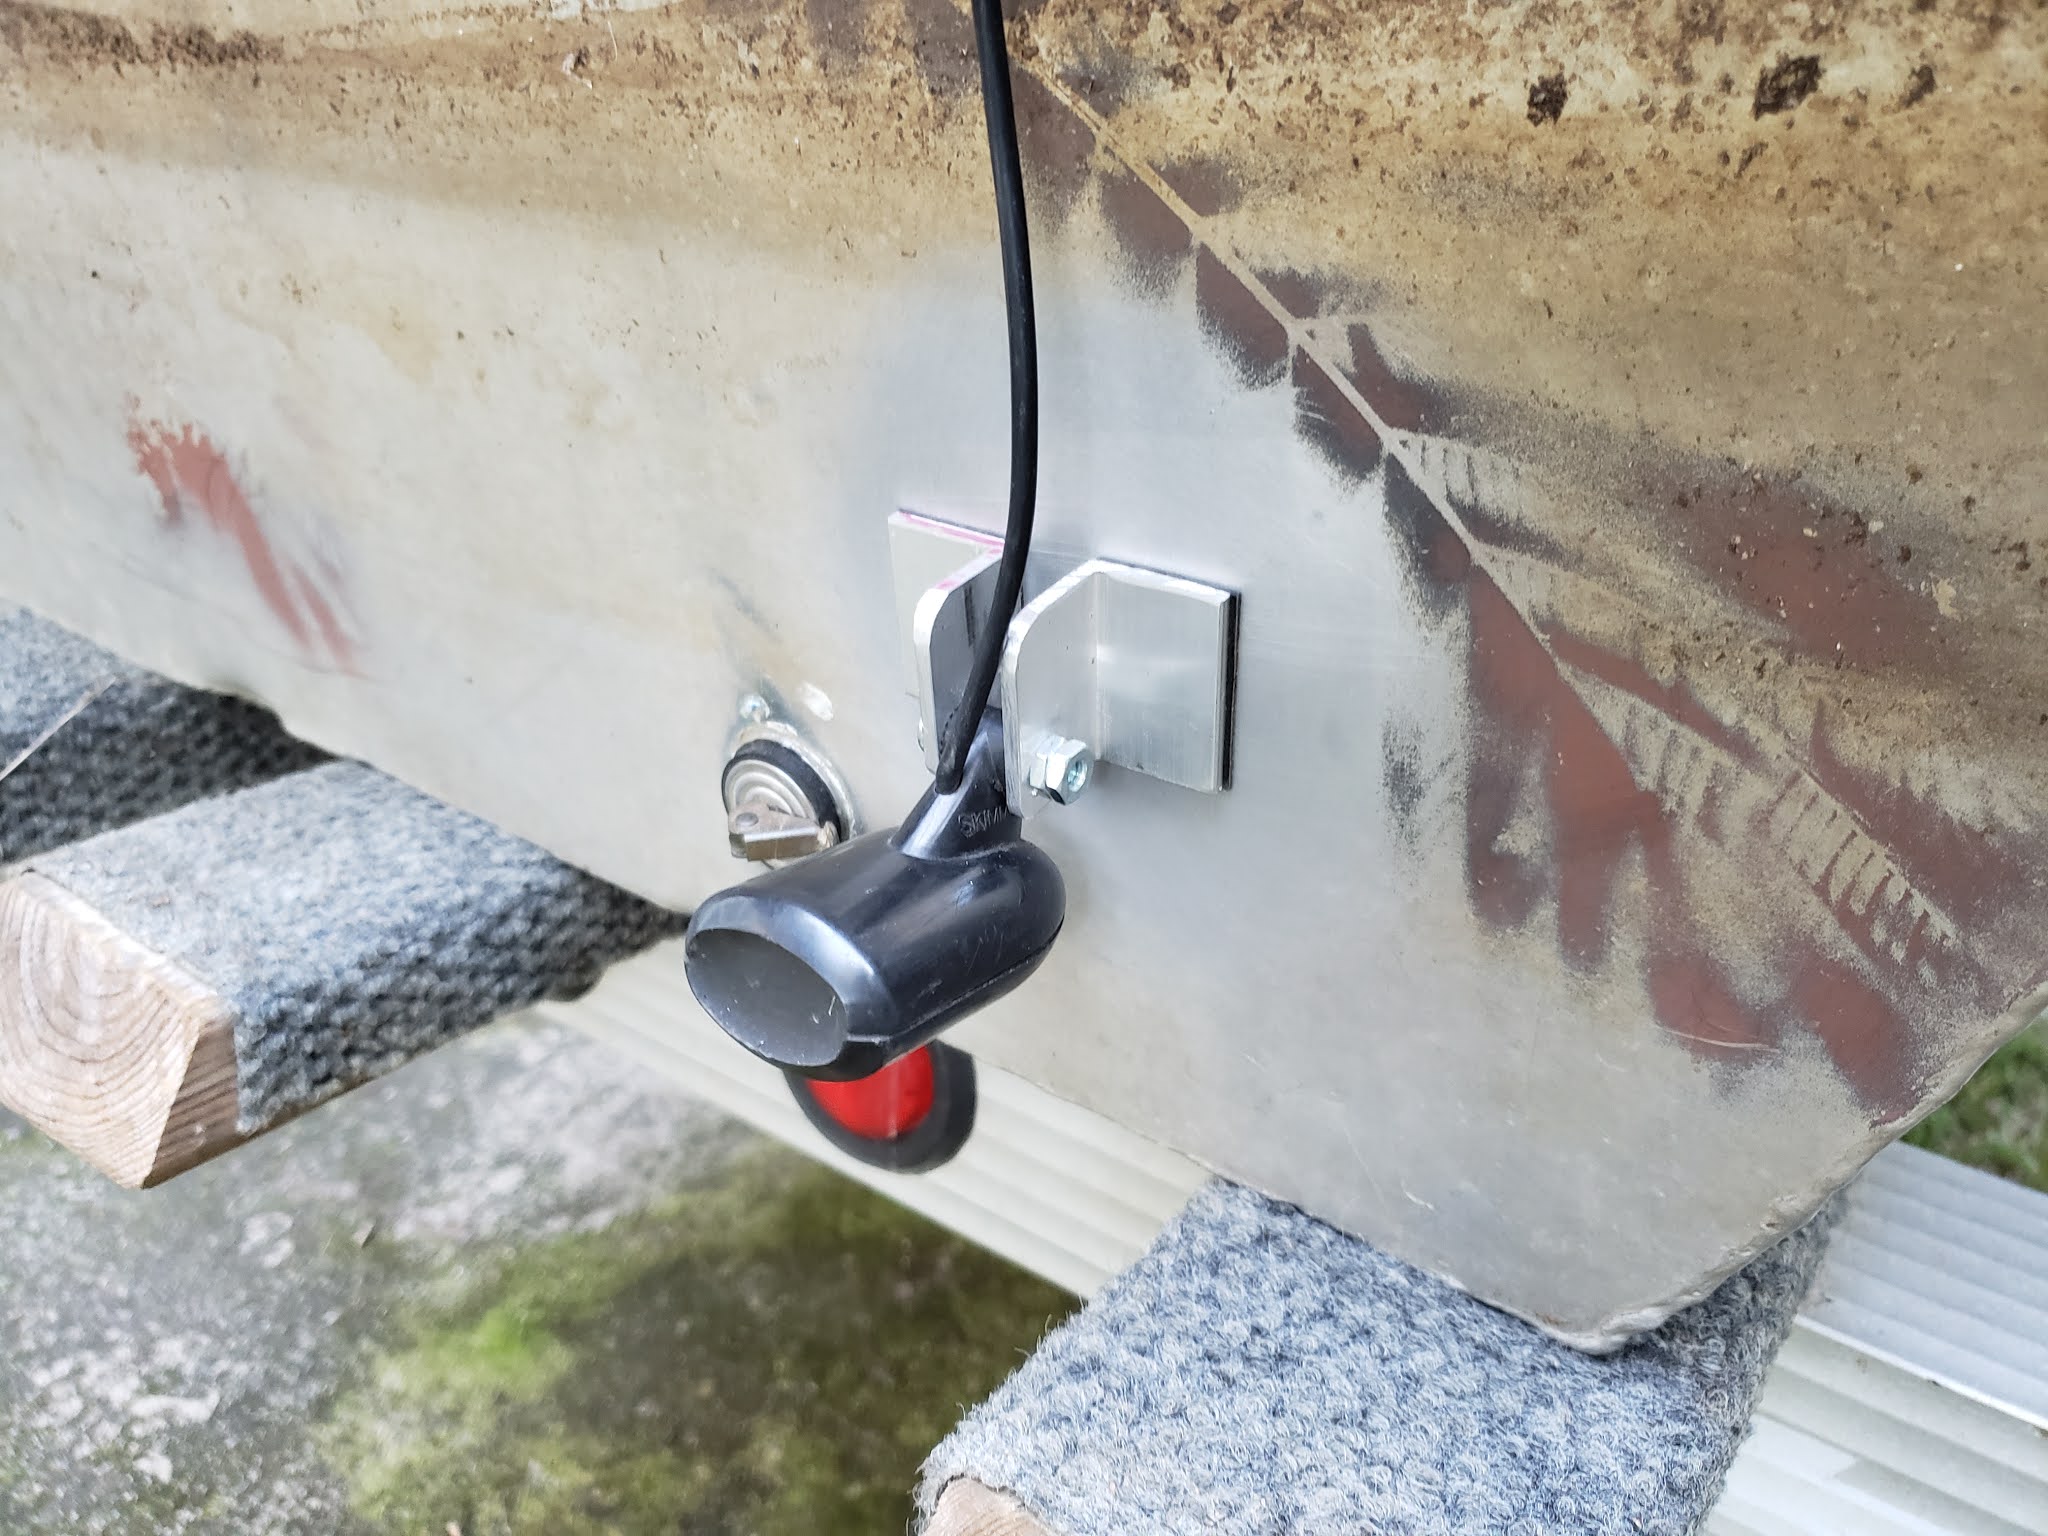
We had been needing a depth finder on the jon boat, but didn't want to spend the $$ for one. I had an old Lowrance x22a from about 1996, but the transducer was bad. A replacement transducer cost more than I could buy a complete working used system on the web. I put a message out on the internet, and found a guy who had an old transducer with a bad unit, and I got that. I made a bracket for the rear of the boat, modified an old CB radio bracket to mount the x22a on the inside of the transom, and got it all wired up. This is electronics on the cheap for fishing :-) Here's a few pics...
Fun times fishing the fresh waters of NC. Check out the tabs and RH Menu for more...
Showing posts with label Landau. Show all posts
Sunday, June 14, 2020
Tuesday, December 25, 2018
Anchor Light Mod
This is a simple modification for one of those little cheapie Walmart Anchor Lights. I never liked that I had to use a screwdriver to loosen the screw, in order to fold the light forward to put the cover on the boat. In this simple mod I used a long self tapping stainless steel screw and a small compression spring. The spring keeps the movable part pressed against the teeth or notches in the mounting base. You just grab hold of the light, and move it where you want. The resulting ratchet action holds it in place nicely in any position.
Minn Kota Weedless Mod
We have an OLD Minn Kota Weedless 65 5 speed trolling motor. It seems to be missing a spacer or shroud between the motor or prop, but I've never been successful in finding a parts list or parts to correct it. So, after looking at newer motors, Deb and I started looking around the workshop for something to make a shroud from. She found an old plant fertilizer container with the correct ID, so I grabbed up the Dremel tool and got to work. I cut and fitted the shroud you see i the following pics, epoxied it in place, and it has been working perfectly to stop all that stuff from getting wrapped around the motor shaft. Another cheap fix to keep an antique trolling motor in operation :-)
Sealed Light Problem...
On a
recent fishing trip with our little JonBoat, Debbie spotted the rear
driver's side tail lamp module on our boat trailer had failed. These are
sealed incandescent units, without any possible access to replace the
lamp. They're not very expensive, but being the tightwad that I am, I
had to set about to attempt a repair.
These have a dual filament 1157 lamp inside, with the wiring soldered
to the bulb, the bulb mounted in a glob of silicon rubber adhesive, and
the red lens literally glued in place. Using my Dremel tool and a
carbide cutoff disc, I cut around the junction where the red lens was
attached to the white plastic housing.
With the red lens removed, I scraped off the melted plastic, pulled
the lamp out, and peeled the old silicone adhesive out. A new 1157 lamp
(costing about a buck!) was re-soldered to the wiring, a new glob of
silicone adhesive (bathtub caulking) was squirted into the middle of the
white plastic base, and the new lamp was nestled down into the
adhesive. Once that cured, I applied a thick bead of silicone caulking
around the perimeter of the lens, and the lens was pressed back into
place onto the base. The excess caulking was wiped off, and the assembly
was allowed to cure.
Finally Legal
Wow....14 days of tracking down previous owners, getting folks to sign stuff, gathering contact information, etc..and I was ready to head back to DMV. Yipee!!! Everyone was happy, we were able to prove the chain of ownership, and it's finally registered to us. NEVER buy a boat from someone who isn't the last registered owner or who can't find the title. It could have just as easily gone the wrong way and we would have lost the boat we bought and paid for. Lesson learned!!
Time to go fishing!!!
Completing the Electrical...
Back on the electrical project for this beast, and got it wrapped up today. Wiring harness now all in place, nice and neat. The LED floor lights are now securely screwed to the fronts of the lower seat frames for both seats. these are great for lighting your feet area while baiting hooks and such when night fishing. Very bright, and cheap as dirt!!

This is where the battery will sit, once I get a light weight batter box installed. Probably going to drop to a series 21 battery for this, and use this new series 27 deep cycle in my bass boat.
Below is the little switch panel I built from aluminum angle, with a fuse box and all of the wiring installed and neatly routed.
Major Electrical....
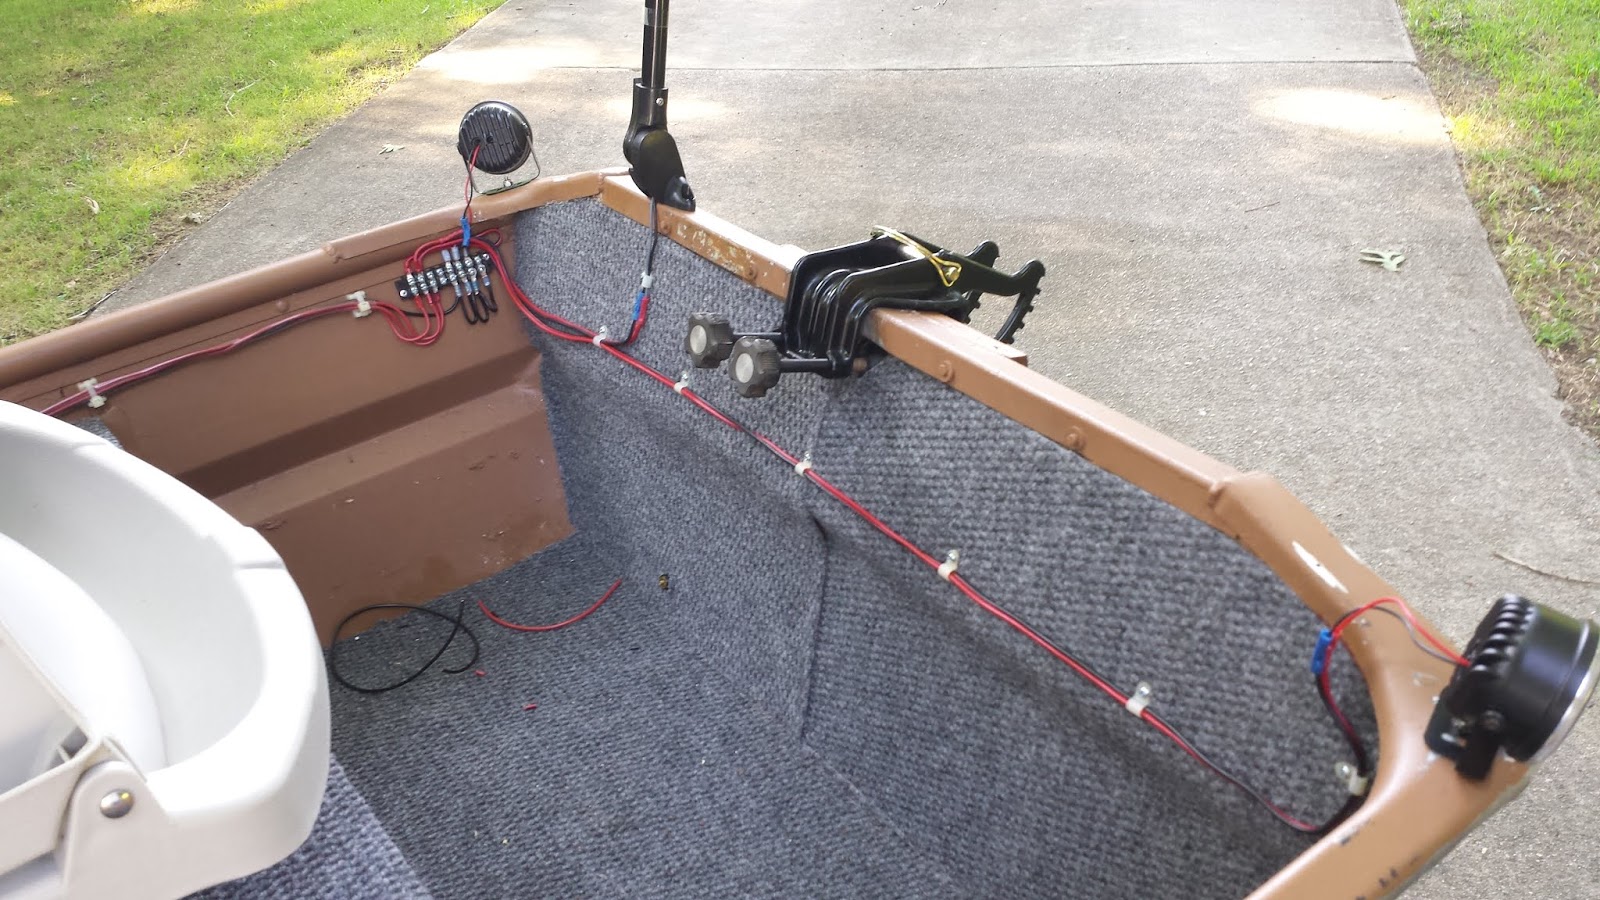
This boat was an electrical nightmare...tiny speaker wire pulled through sharp holes that were drilled in metal surfaces, literally looking a time to start a fire or leave us stranded out on a pond somewhere. I grabbed it all, and started ripping it out, including the switches that were taped to the transom. Once that mess was all out, I started over. First thing, a piece of aluminum angle was drilled, fitted, and installed in the middle of the boat with the three switches. That way, Deb or I could easily reach them. They were to control the navigation lights, fishing lights, and an aux circuit for phone charger / fish finder.
Next, I set about to build a sheathed wiring harness to go from the front to the back of the boat, install screw-type terminal strips in the front, back, and middle.
Carpet Time!
Wow, what a raggedy carpet job this thing had...it was coming up everywhere, was all crooked on the transom, the floor ribs were exposed, and some area weren't covered at all. That makes for a noisy boat when you are moving around in it, and drives me nuts to look at it :-)
We found a roll of the same exact indoor/outdoor carpet that was used in the boat for $19 at Lowe's, grabbed a can of 3M77 adhesive spray, and headed back to the house. Debbie took some paper to make templates, and got started.
I covered the runners on the converted motorcycle trailer, while Debbie was working on the boat. Boy, this makes the boat slide on and off the trailer much easier!
Debbie was busy fitting and reworking the carpet in the boat, while I started ripping out all of that spiderweb of tiny speaker wire and such a previous owner had attempted to wire the boat with...
New seats!
During our shakedown run, I discovered I really wanted the rear seat in the middle, and the hard plastic seats that were in the boat were rough on my backside after about 2 hours. Debbie picked up a pair of folding seats with cushions very cheap at Walmart, and I set about to get them installed.
There was a 2x6 wooden seat spacer on both seats, where the 6x6 rotary mount would attach. I pulled both seats off and found only 2 short wood screws holding the rotary mount, and something the looked like drywall screws holding the 2x6 spacer to the OEM seat. The whole business was sloppy and moving all around. I drilled and anchored the 2x6s securely to the factory boat seats, and the same with the rotary mounts. It's now solid as a rock, and the seats are where we wanted them. In the pic below, the first seat is installed.
This handy dandy right angle ratchet screwdriver is the ticket for getting to the screws that go through the rotary mount and up unto the bottom of the seat.
1st Check Run...
We were dying to get this thing in the water, so we loaded it up and took off to a private pond we have access to (since we didn't have our registration numbers and such, yet). It was a good shakedown run, and we found several things that needed attention. Just like when building a motorcycle, never make those first runs too far from home, or too far out...
1- This boat is STABLE! I was concerned about a 10' boat with the two of us, and was even considering building outriggers for it...but after a couple of times out on this boat, I wouldn't think of having outriggers now. Deb and I talk to each other before we stand up, but this 48" wide hull is wonderfully stable. It didn't take long to get used to small amount of roll it has when we move around in it.
2- This is a riveted hull...and a couple of the rivets leaked. Not bad, but I took care of that with silicone caulking when we returned.
3- The previous owner had the rear seat all the way to the left, and intended the battery to go all the way to the right to balance it, but that is a miserable setup. I decided to move the seat to the middle, and that 60lb series 27 battery had to go!
4- We burned the forward / reverse switch out of that ancient Minn Kota trolling motor on the first run. It was difficult to switch, and probably had oxidation and was making bad contact, as it was getting pretty hot. Walmart had an exact replacement on the shaft in the boating section for a couple of bucks. Replaced it when I got home, and it's been working perfectly ever since.
5- Those HARD plastic, non-folding seats had to go. My butt was on fire back the time we got back to the ramp.
Transom Mount & Stuff...
I found a couple of pieces of wood in my workshop, and cut a couple of new narrow transom spacers, treated them with some deck seal I had, and installed them on the transom where the old rotted piece was (the piece that covered the hull ID #'s). I also welded / repaired / painted the tolling motor mount, picked up a quick release pin for it (to make popping the trolling motor on and off much quicker), and got that installed. All was well, and the hull ID # was easy to see. I tossed it back on the trailer, and headed off to the local DMV office. Upon arrival, the agent searched the number, and told me the boat was not listed as stolen, but it had not been registered since 1992. Now, I was informed I had to put together a list of owners and contact info, dating back to the last registered owner, to prove that I truely owned the boat. WHAT!!! Yikes... Here we go again. This thing had changed hands a BUNCH over the last 18 years, so I set off on that trail.
There was still so much on this boat that had to change to make me happy....example: those black switches in the photo below were literally stuck to the wood with double sided tape and were already falling off in the summer heat. Honestly, almost nothing on this thing was installed the way I wanted it, but the bulk of the parts were there, so at least I had something to work with :-)
Here's where the drain plug should have been (and is now). Someone had stuck a bolt with a couple of big washers, a nut, and a huge glob of bath tub caulk all over it. I cleaned all of that goop off, picked up a 5/8" drain plug from Walmart for about $1, and it was back as it should be.
A lot of the ponds we fish in have no ramp, so you have to pick the boat up and set it in the water. Debbie is about 5'1", so it is important that the boat be light. That's one of the things we liked about this Landau...very thin hull and the boat only weighs 62 lbs without the motor and battery. 31 lbs each is an easy tote from the trailer to a farm pond! Check out the little black handles I added to the hull, near the balance point of the boat. I did this on both sides, and it made it easy for us to pick up and carry.
Now, on to my previous owner search...
The Title Journey Begins...
Oh boy, oh boy... I heard folks say "just get a bill of sale from the owner, and that's all you'll need to get it registered". Not so! Others said "I wouldn't bother registering it", but if you plan to use a trolling motor and go in public waters, it's required. So, I decided to do what had to be done.
I stopped in at the DMV boater's registration location, and learned I had to track back to the last time it was registered, or at least be able to prove the trail of owners. 1st, the said I had to find the hull ID number, before they would do anything. All boats made in or for the USA since 1972 had a hull ID# attached. I looked all over the boat, and couldn't find it. It will always be in the upper RH rear of the outer transom, and typically there's a hidden # somewhere else on the boat, in a secret place by the mfg. I searched the internet, and finally found the phone number for Landau. I called, and it seems they had gone out of business many years ago, were bought out for some other family members, and now they only make Pontoon boats. There was a guy there who worked for them for something like 35 years, and he talked to me. He confirmed, there would be a number on the outer upper rear transom, and the secret # would be in one of several locations he gave me. I searched and search, and couldn't find it. Now, I was beginning to get worried that it had been stolen and the number plates removed. I noticed the transom had an extra board attached that didn't look stock, seen in the pic below.
That's where the last owner had bolted a raggedy broken / patched
trolling motor mount. What the heck, the board looked rotten, so I
decided to rip it off...Low and behold, there was the hull ID number plate, _AND_ the "secret" ID plate (almost in the center of the transom). BOY!! Was I ever relieved.... I cleaned them up, and began to fabricate a new transom spacer that was not as wide, so as to not cover the hull ID#.
Little did I know, this was just the first step in getting this registration issue resolved...
Jon Boat: Starting Point...
This is basically how the Landau was when we bought it off the Marketplace. The previous owner had started doing some things, and had a bunch of extra parts to go with it. The trailer wasn't included, that's a Triton motorcycle trailer I already had. I slid the rails over, cut a few 2x4's and bolted on, to slide the boat onto.
It had some hard plastic seats mounted (barely), home made rod mounts, some LED lighting installed with drywall screws, an old Minkota classic trolling motor w/broken mount and missing parts, new type 27DC battery, a new charger, anchor rope cleats, a pair of paddles, a pair of LED interior lights, a pair of anchors, a wad of anchor rope, a new solar panel, and some carpet (poorly installed). Overall, for the price, it was still a great deal. He didn't have a title/registration for the boat...little did I know, it's not as easy to fix that and it would seem! More on that later...
Subscribe to:
Posts (Atom)