Monday, October 31, 2022

Houseboat build, pg33...

 Wow, busy times, and things are coming together nicely! We got the electrical boxes foamed in, got the luan up on the front and back walls, got the distribution panel cut in, windows foamed in the front, Debbie did some cool custom paint, and the bedroom lighting loop is completed and lights installed. Misc electrical covers are now installed, and a bit of trim work around them is completed. Here's a few pics and descriptions...

Debbie originally wanted to do a "shiplap" vinyl overlay on the back wall. This would have the look of shiplap, ut not the weight. She applied vinyl, but humidity, etc was just not allowing that to work out. She decided to paint it on, instead! Here's the first step of the process...laying down the horizontal lines and weathering. 


Above it the artist at work. It's amazing to me, to watch her do this stuff in her crafting, but this was totally over the top. Wait util the see the end result....


Meanwhile, in the two photos above, I was getting the luan plywood cut and installed on the front wall. It fitted up pretty well, I still have to foam the receptacles / switches, and get it ready for paint. 


Here's the back wall, with the painted-on shiplap completed. You can see the electrical panel cover fitted here, waiting to be blended in...


Here, Debbie had blended the electrical panel's cover into the artwork. WOW!!! I love this look, and it's VERY light weight. 


Here's a pic of the panel with the cover popped open. I have to make the labels for the breakers and get them stuck in there, but it's amazing how this blended in!


The three pics above are of the new bedroom lighting parallel power circuit in action, with the lights installed. The lights were originally designed to have 40w halogen lamps installed, but they are HOT! I retrofitted them with 3000k soft white 4w LED lamps. You can't tell the difference in them, but they pull considerably less power and are MUCH cooler! In the top and bottom pics of this group of three photos, you'll notice a white cable hanging down. This is for a small TV that will be mounting in that area, once finished.


Here, the front wall is completed and ready for paint. Debbie will get on that tomorrow, I'll be working on another facet of the project. 

http://www.NCFishy.net

Wednesday, October 26, 2022

Houseboat build, pg32...

 Here's a few photos of the latest work. The starboard wall is finished, the shower head plumbing is installed for the wall-side shower head (there will be 2, one on each side of the shower), the rear wall is now covered in luan, and about half of the front wall is installed. The project is moving along nicely! Here's a few pics...

This is part of the spray foam system (Froth-Pac) we bought to do the interior insulation. 

Here's the shower valve and piping for the spray head. You'll notice the "T" and piping going up the wall. That will go to another shower head on the opposite side. As opposed to spraying from the center towards the shower curtain, or from above, small heads on either side will spray and hopefully keep most of the water in the shower stall. 


Monday, October 24, 2022

Houseboat build, pg31...

The last couple of days have been slow, but productive. I'm installing the wall coverings, and there's lots of openings to put in each sheet, once trimmed to the correct size. I now have the port side wall completed all the way up to the ceiling, and the starboard side completed up to mid-wall. I should be able to finish the starboard wall today, and hopefully the back wall. The wall panels are installed with construction adhesive on the face of all the metal studs, then secured with 3/4" sharp point self drilling lath screws. The horizontal areas between the studs are fill with 1x2 wood strips to reinforce those spaces. The wainscoting (wall covering we chose) is installed with the grooves horizontal, so it made for a few additional installation challenges, but it gives a "longer" feel when looking down through the house and seeing the horizontal lines. The ceiling covering will also be oriented this way, but the back wall will be smooth luan 1/4" plywood for Debbie to do some artistic stuff on. Here's a few pictures of the progress, out of order, as usual... 


http://www.NCFishy.net 


Friday, October 21, 2022

Houseboat build, pg30...

I've been busy the last few days, in preparation for the insulation phase. The freshwater tap is now installed. I installed all of the coax pulls for TV, VHF marine radio, and ham radio VHF & HF antennas. All of the terminations are completed for the interior switches, lights, and receptacles. The generator port and rear heat pump condenser ports had wire dropped to the boxes, prior to foaming. I tested all of the electric, pressure tested the plumbing, installed the mounting blocked for the shutters, installed the mounting blocked for the front awning posts, installed the electrical wiring for the solar power drop from the roof, and triple checked everything for possible leaks during rain storms.

Next,  the day of foaming has arrived. I was trying to make sure everything was done prior to this, because once it was foamed, it would be difficult to do some things. I finally pulled the trigger on the foam guns, and this is the result....

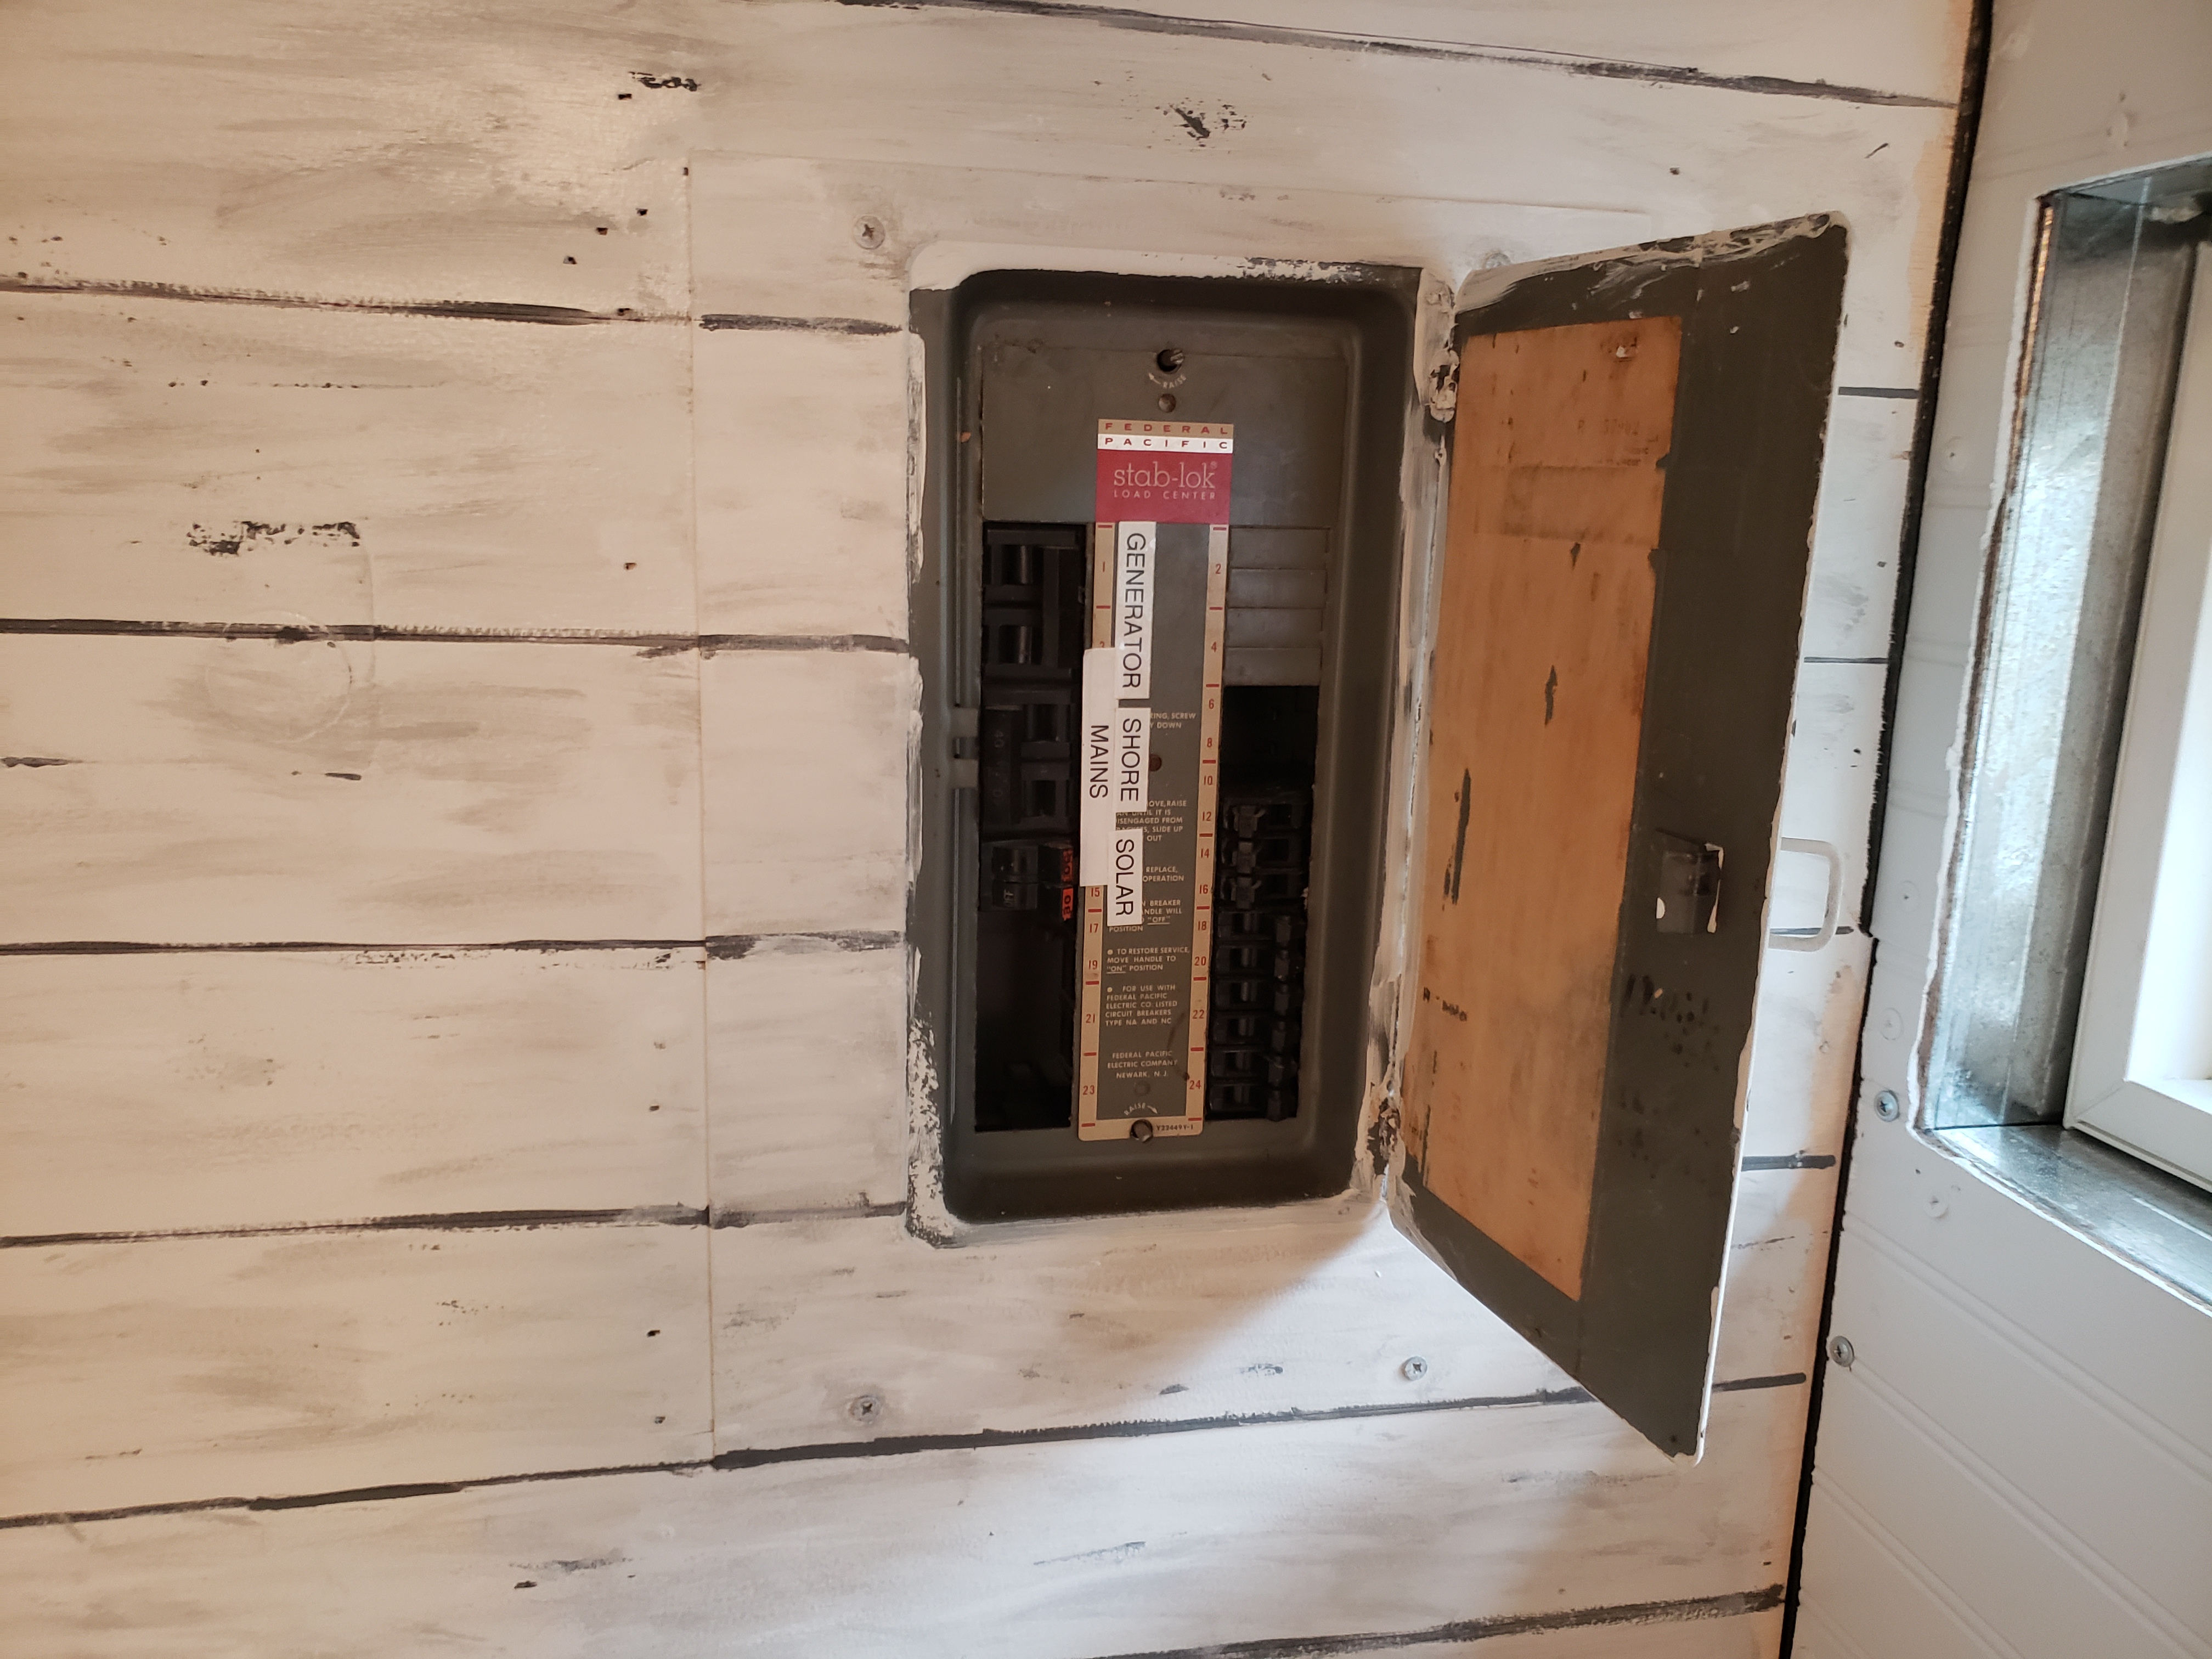
Here's the electrical panel, modified for 115vac, with the upper LH breakers being used as "mains", the lower RH breakers as branch circuit control. 


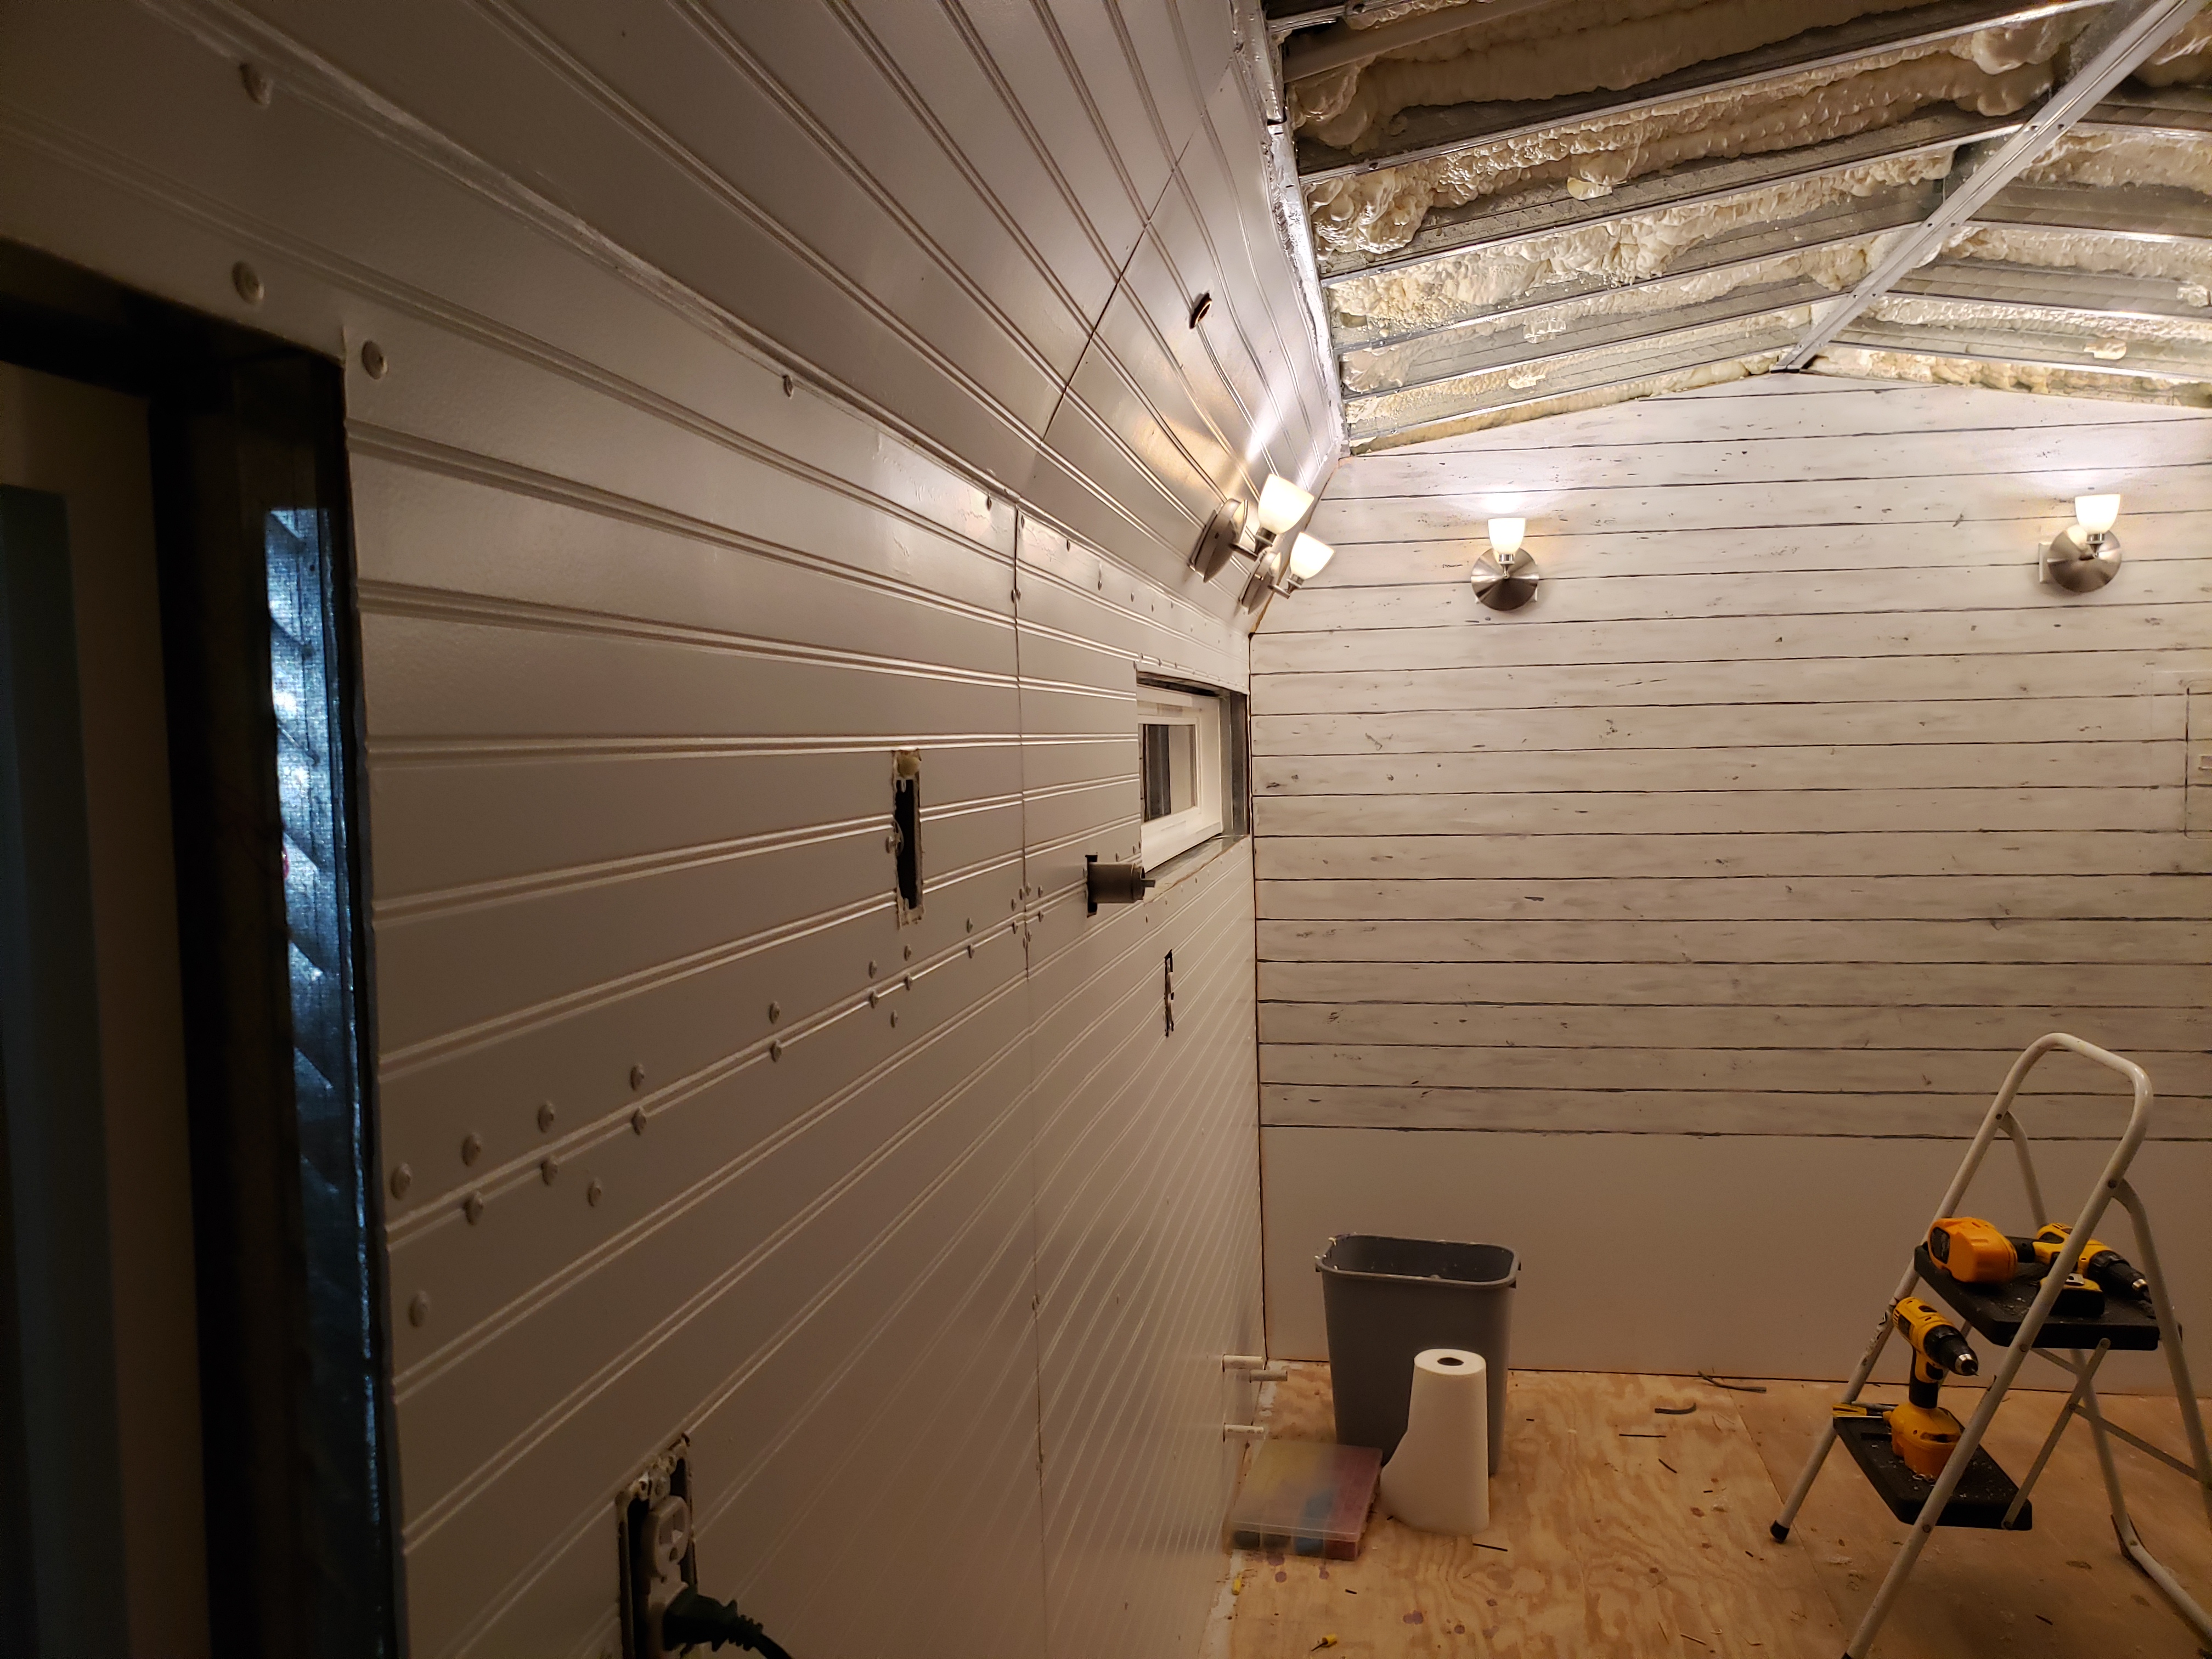
Here's a photo of the interior, after the foam was sprayed. Boy, what a mess! It cleans up pretty easy, though. All those globs on the floor stick and have to be scraped away with a metal putty knife. 


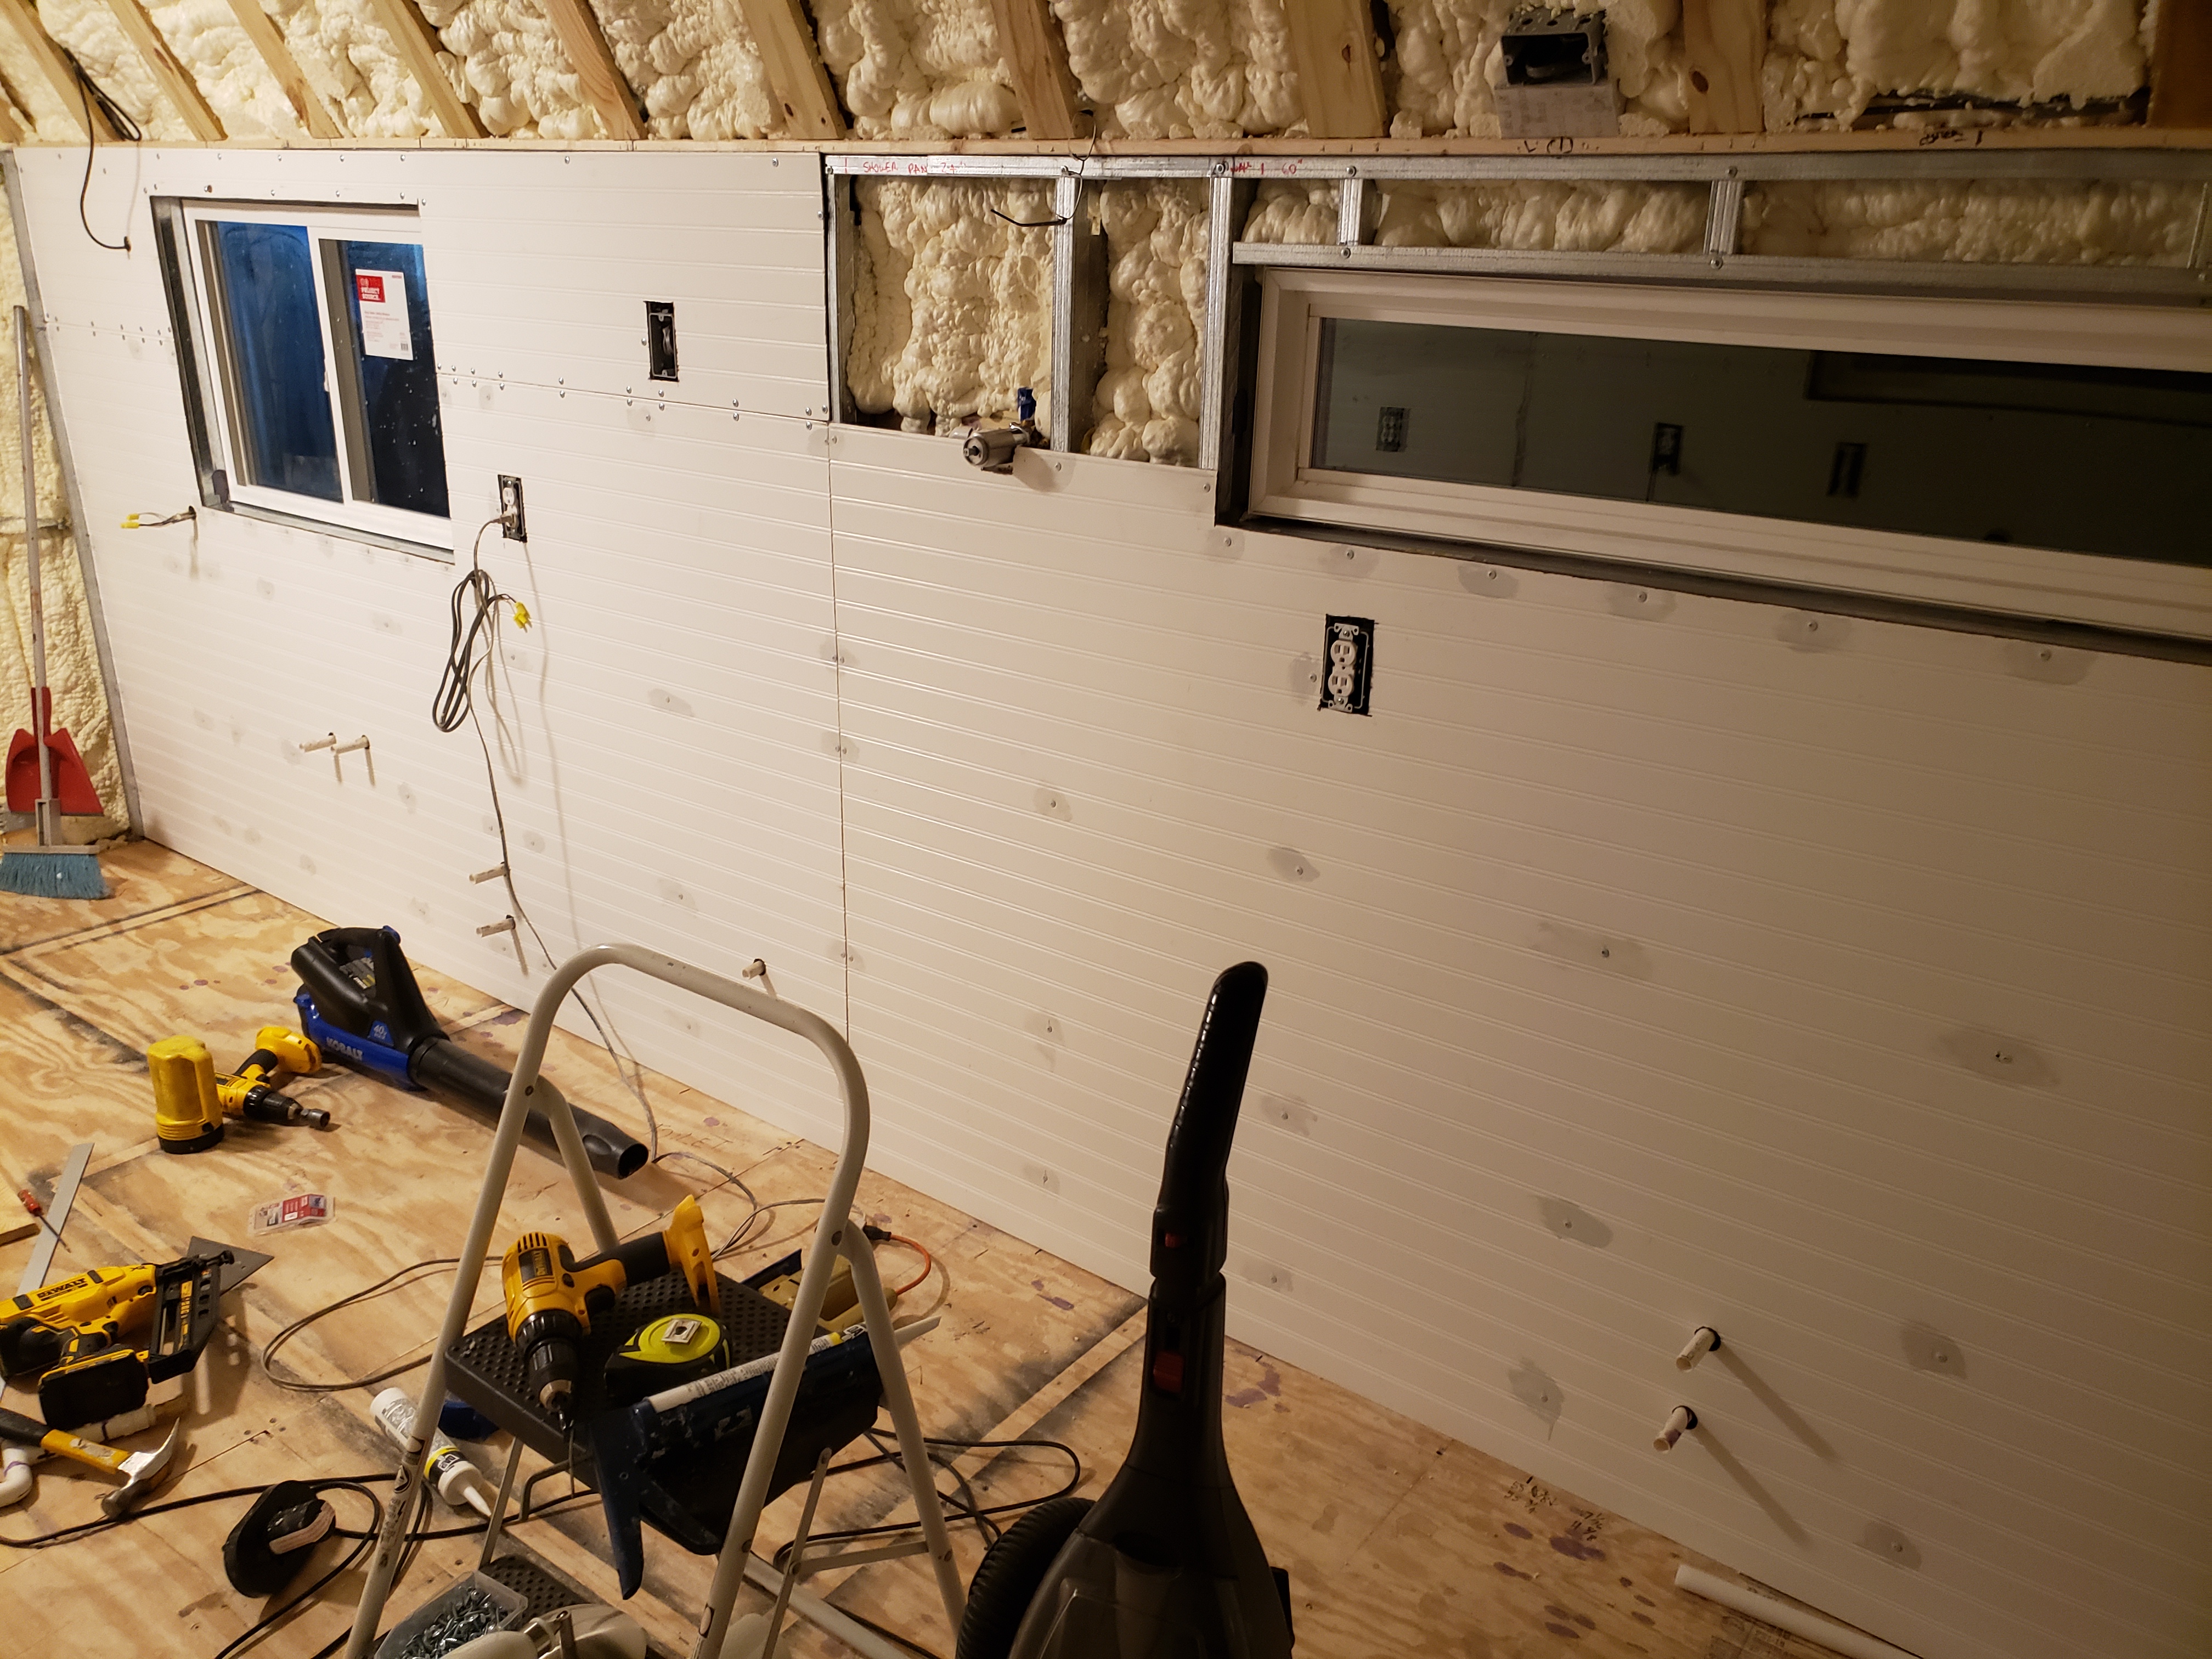
The two photos above show the walls after being fully sprayed. Most of the floor cleanup was finished, and I was scraping the studs and using a hand saw to level the foam in places where it expanded beyond the face of the studs. 


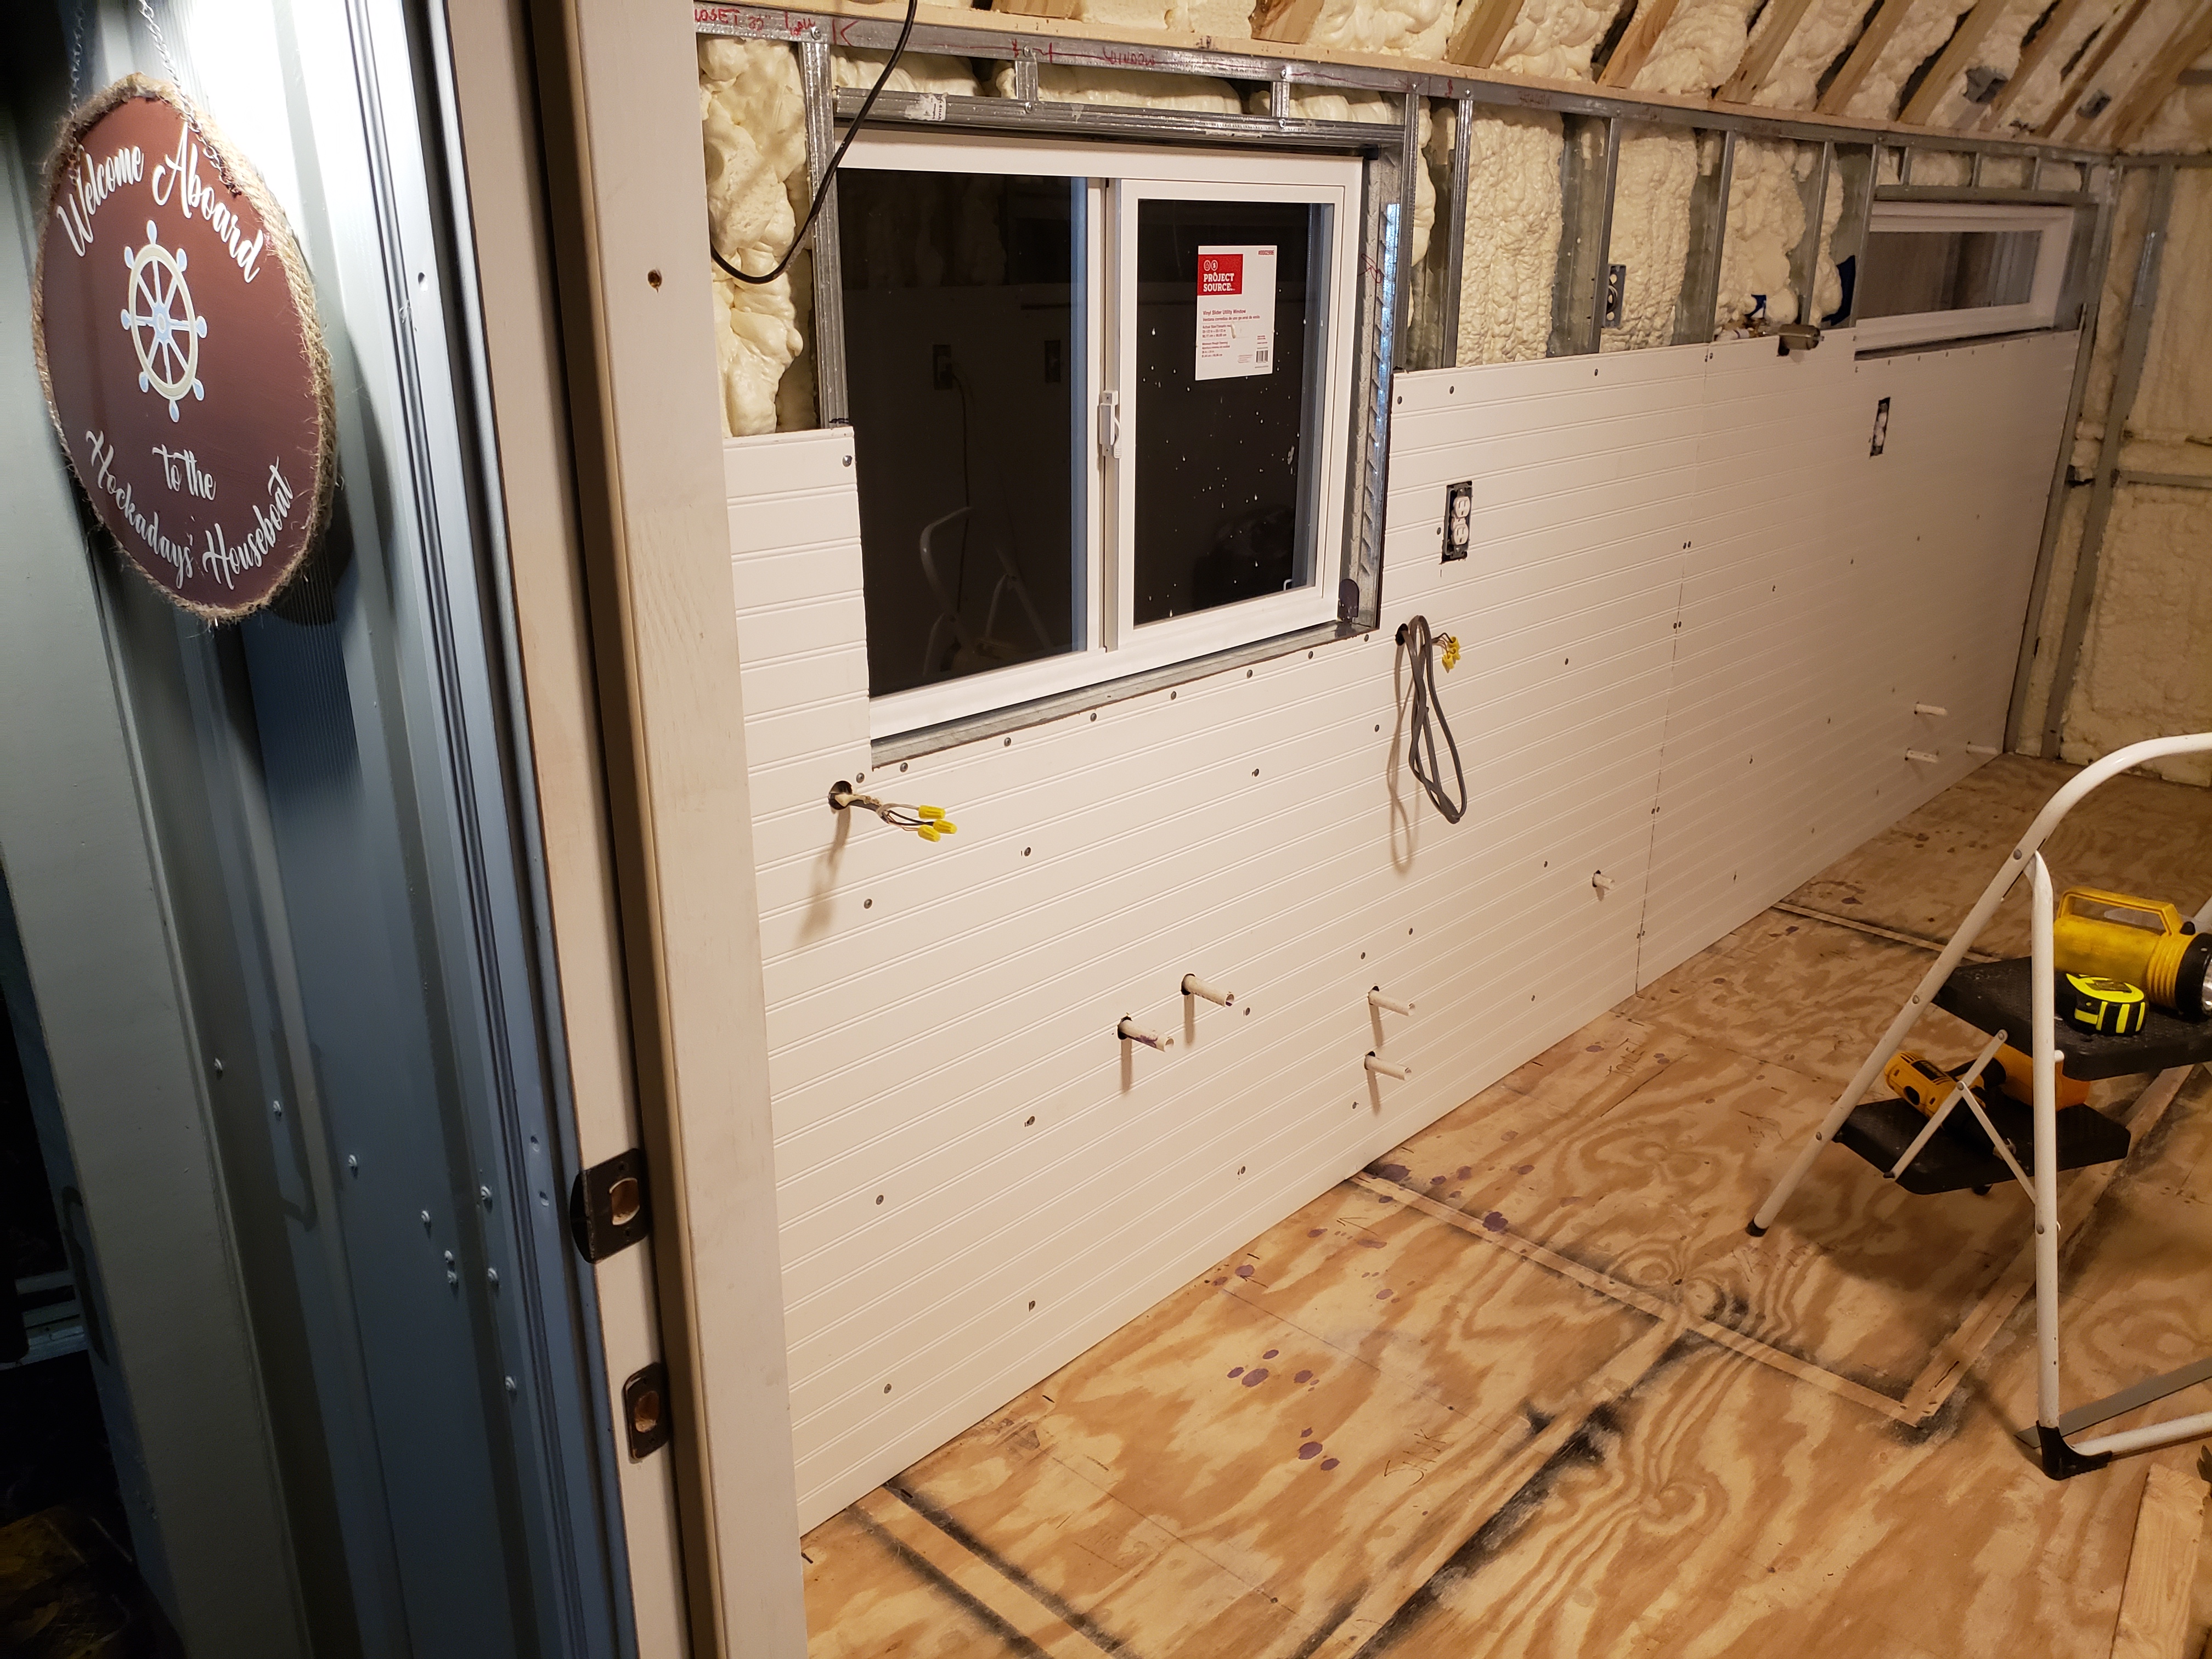
The two photos above show the interior after the studs were scraped, and after the foam was leveled with a hand saw. Once the floor was scraped again, we used electric orbital sanders to sand the floor and remove and remaining foam residue. 


Once last photos from outside, it's now time to install wall coverings! We're excited, as the interior walls will now be framed up, cabinets built, and and it'll become a house!

http://www.NCFishy.net

Saturday, October 15, 2022

Houseboat build, pg29...

 Wow, what a productive day! We got the rain drips cut and installed on both of the transom windows, and got them caulked. I installed the dark water service port on the starboard side of the boat, so it can be pumped at the marina. Deb and I installed the interior mounting blocks for the shutters, and got those caulked. Deb touched up the paint around the dark water port, and also sealed the mounting holes on all of the shutters. I installed the shore power electrical port on the back of the  boat and got it wired into the main breaker panel, inside. All of the electrical was tested and documented to properly label the breakers. The lighting was connected and tested for the front porch, the dining area, and the bedroom. Wow, I love progress!! Here's a few pics, and I'm sure they're out of order :-) 


In the three photos above, you can zoom in and see the rain drips we installed over the top of them to stop water from running from the roof and down the fronts of the windows. You can also see the new home-made shutters installed. 


The field wiring connected to the power distribution panel / break box. Debbie found this on facebook  marketplace on the cheap. It was a used panel, but worked out well for our application. 


The above two photos is of the dark water service port I installed. It allows the sewage tan to be easily pumped from the dock at the marina. 


Above are some of the wooden blocks we installed on the interior of the walls, to allow attachment of our shutters around the windows. The screws were caulked well, and these are also caulked in place. Next, the spray-in foam insulation will finish the permanent installation of these!


Here's a shot of the rear deck with the various ports installed. The white port in the lower left is the AC shore power port. The gray box above it is the electrical drop for the heat pump condenser unit, and the clear-ish box to the right is the port where the generator will plug in.


The two photos above are more that show the rain drip edge that I cut and installed, as well as a better photo of the custom shutters. 


This is one of the six bedroom lamps that will be installed in parallel and switched from a common switch. These were converted from halogen to 3000k LED lamps. 


Here's a photo of us testing the dining area LED 3000k lamp. It really pumps out a lot of light, but is rated at 6 watts of power usage. Amazing!


Testing the LED front porch lamp. Debbie found this and it matches the hardware for the locks on our front door. It looks really nice and puts out a ngood amount of light, too!


Here's a few shots at night with the various lighting, "on". It's so nice to finally be operating the houseboat on it's own internal wiring. It kinda gives a sense of "accomplishment".  


Here's a night-time photo of the rear deck, showing the "test" umbilical cord I have the houseboat powered up on for testing all of the circuits. 


I took this photo, looking in the front, just before powering everything down for the night. It's beginning to feel like a house!

One last photo of the house's internal power distribution panel. This shot shows the main shore power feed coming in through the top LH side to one of the breakers I'm using as a "main".

http://www.NCFishy.net